Your computer's clock may be as many as a few seconds to a few minutes off the correct time. Therefore, Windows 7 includes a time synchronization scheduler to synchronize your clock automatically, located on the Internet Time tab in the Date & Time Settings. The default interval for this process is one week (which is 604,800 seconds). There is no way to change this interval through the user interface, it has to be done using the registry editor (regedit).

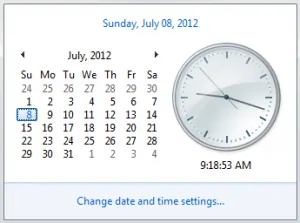
Open Internet Time Synchronization. To do this, open Date and Time Settings. You can do this either through the Control Panel, or by clicking on the time on the taskbar, then clicking "Change date and time settings..." then clicking the "Internet Time" tab.
Verify the computer is set to synchronize automatically.
Open the Registry Editor. There are several ways of doing this, choose the most convenient for you. If you get a User Account Control dialog, click Yes.
Press the Windows logo key and R. This will open the Run dialog. Then type regedit and click OK.
Alternatively, open the Start Menu and type "regedit" in the search box. Click the regedit program to open.
Navigate to HKEY_LOCAL_MACHINE\SYSTEM\ControlSet001\services\W32Time\TimeProviders\NtpClient. Just click the arrows next to the folder icons to navigate to the correct directories. You may have to scroll a bit when you reach the SYSTEM key.
Right click on the SpecialPollInterval key, then click Modify.
Convert your desired time to seconds. You can quickly do this using Google.
Click Decimal. Then, enter your interval in seconds (without commas), and click OK.
Close the Registry Editor.
Open Date and Time Settings. Click Internet Time, click Change Settings, then Update Now. This will immediately synchronize your clock. Click OK to close the dialog.
Confirm your new synchronization interval works. If it does, the next synchronization time should be exactly one interval away from the time you synchronized.
No comments:
Post a Comment